Choosing the Right Microphone

crosstalkmicssm57md421.l

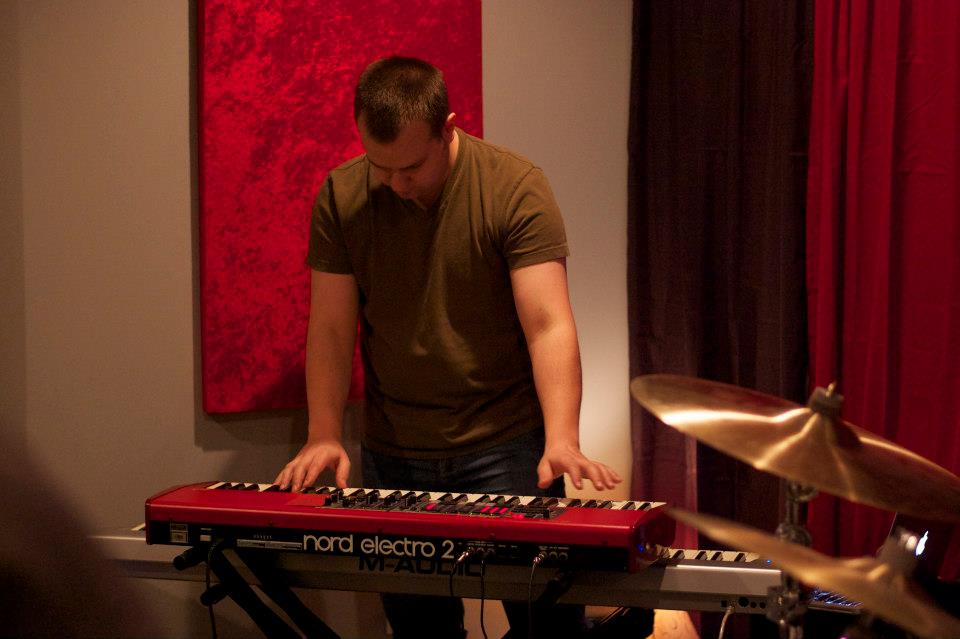
There are many different types of Microphones out there of every price level from $49 on up to $1000’s. Now, for most of you, I will keep my examples within the $200-$400 range. It is also going to depend on what you will be using the microphone for. (Guitars, vocals, all around, etc.) First we will talk about purchasing Microphones.


Purchasing a Microphone

If you can afford it, it makes sense to buy a range of microphones and use the most appropriate one for each job. If your budget is more limited, think about all the different things you need to use the mic for and try to find something which will do a reasonable job of as many of them as possible. Most of us out there can only afford to have a few different types to choose from, so lets talk about the most common types and their uses.


Different Mic Types

There are many different types of mics out there but what do they all do? Let’s break it down in to the (2) main categories:

  1. Condenser Mics
  2. Dynamic Mics

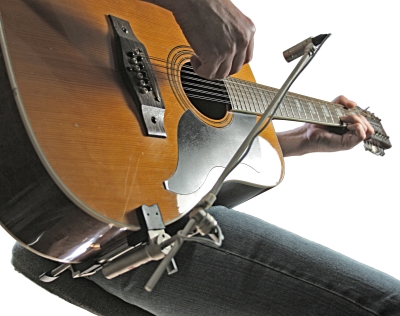
Condenser mics work better on high frequency instruments like acoustic guitars,  cymbals pianos, etc.

And dynamic mics work better on low-mid frequency instruments like electric guitar cabs, drums and bass cabs

While it is much more complex than that, this is a great beginner’s starting point.


Popular Microphone Brands and Models

Microphone quality can vary from brand to brand, model to model or even within the same brand. I have often heard a lower cost, lower quality mic track a better sound that an expensive, supposed high quality mic. This doesn’t happen often, but as you are out there searching, you will see that no two mics are the same. They all have their own sound. That being said, I am going to talk about the best couple of mics to have in your arsenal, whether you have a project studio or you are in the big times.

Shure SM57 – In my opinion, (and everyone else s on the inter web) the Shure SM57 is a must have. They only cost around $70-$80 new and around $50-$60 used. You cannot kill these mics. I once found one after a concert I played that had been broke in half. I took it home, rewired and re-soldered it and Bam. Worked ever since. These mics are great for Guitar Cabinets, Acoustic Guitars, Drums, Percussion, Backing Vocals, and everything in between.

Sennheiser MD 421 – This mic is a must have in any recording studio. They do cost a little more, but the uses are endless. These mics usually run around $375-$400 new and are optimal for recording drums, guitars, almost any other instrument and back up vocals.

Behringer C1 – The Behringer C1 usually costs around $100. It won’t get you anywhere near the tone and quality of the more expensive mics, but for home recording it does the job and it does it fairly well. It’s fair to say that most home recorders won’t have their rooms acoustically treated, so you won’t be able to pick up as much of a difference between this mic and the next (the room is the most important bit of studio equipment you can invest in, by the way).

I hope that this post has helped you even in a small way figure out what it is that you need to do to find what works best for you.

Please leave your comments below!


TOPIC: The Importance Of A “Click Track” When Entering The Studio


Everyday_Looper_Click_Track_Generator

In the modern music era, entering the studio for a demo or full album recording can be intimidating. The current state of popular top 40, hip-hop, and rock ‘n roll music may best be described as slick, polished, and harrowing to reproduce in anything but the most expensive studios. By extension, the sound of modern drumming is predominantly mechanical and measured. If you want to produce a recording with a professional sound, then you should consider whether, and how, to utilize a metronome, or “click-track.”

If you have never used a metronome before, the first step will be to choose a model that you are comfortable using. You will want to check that the sound of the click is audible while you play; but a harsh, grating tone will make your studio session an exercise in teeth-grinding. You will typically want your metronome or drum machine to sound like a cowbell: a precise, upper-midrange “ping” will cut through clearly in most playing situations.

Remember that the click-track is only your guide. The metronome is not making any music: you are. If you have put in the work in rehearsal, the click-track will not dominate or overshadow your studio session. You will have the assurance that your best performance will not have an unintended sway in tempo. By the same token, a click track will not fix a bad song, mask sloppy playing, or energize an uninspired performance. If used correctly and diligently, and if you remember to keep it musical, a click track can be a valuable tool to polish your playing and to finish your recording with a professional edge.

http://www.thestudiobunker.com

Acoustic Guitar Recording

Miking Guitars1

Recording a great-sounding acoustic guitar track used to be a real challenge, but with today’s highly affordable hardware and software, you can have the power of a pro studio right in your computer on your desk.

Mistakes:

There’s nothing worse than playing a beautiful take and then flubbing a note or two. Sigh. Do you try another complete take or punch in to fix the mistake? Neither! Record a brief section on another track that duplicates the area where you made the mistake. Now, simply copy and paste a good note from the new track into the master track to fix the note you flubbed.

  • It may sound more natural to copy and replace a few notes or a short section of music than to copy and paste just one note in a passage. For example, if a note is ringing underneath the bad note you want to fix, you may want to copy over the entire section containing the ringing note for the most natural sound.
  • Make sure the timing of the replacement is correct so the rhythm of the part remains smooth.
  • Be careful to record the replacement track with the same tone and volume as the original.
  • A very short cross-fade (in which one audio region quickly fades out while another fades in) can be applied if you hear a click on either side of where the replacement note or section was inserted into the track.

Divide and Conquer:

If you recorded the main acoustic guitar part for your song with two very different styles—for example, soft arpeggio picking during the verses and hard, heavy strumming during the choruses—you may find it difficult to get the two sections to work when you’re mixing. They may be far too different for the same EQ and compression settings to work well in the context of the song. You could go through and automate your plug-ins so the sound of the track changes at the appropriate time. Here’s an easier solution:

  • Cut the guitar track apart at each verse and chorus section.
  • Create a new track and move the chorus parts down to the new track. (Be careful not to shift them in time when you move them to the new track.)
  • Listen to the two tracks. If necessary, add very short fade-ins and fade-outs to each section to prevent clicks and pops at the edit points.
  • Set the volume and plug-ins as desired to make each track or part sound its best.

With the verses and choruses on separate tracks, you can optimize the sound for each section, giving you more control and creating a more balanced result.

Automate Compression:

There always seem to be a few spots in an otherwise perfect take where a note, chord, or strum pops out. When there are only a few large peaks in a track, it’s hard to set a compressor to catch them without also affecting the rest of the track. Recording engineers used to “ride” the faders to control the level. The engineer would get to know the song, and, as the singer or player performed a part, the engineer would manually move the microphone’s volume fader to manage the overly loud dynamic peaks. (Needless to say, it took a talented engineer to do this well.) However, you can use the supernatural powers of your DAW to attack the problem in a much more controllable way when you’re mixing.

  • Record your track in the usual fashion. Don’t worry about a few loud peaks, as long as they don’t distort.
  • Zoom in on the waveform view on the track and find the problematic peaks.
  • Turn on volume automation for the track.
  • Create a quick volume dip where each peak occurs so that the loud peak is reduced and “sits” properly in the track.

Clean Your Tracks:

If a track plays all the way through a song, background noises typically aren’t a problem. But if there are gaps in a part—say you strum during the verses but don’t play during choruses—any noise in the background when you aren’t playing (breathing, a sleeve rustling, a chair creaking, an air conditioner turning on, whatever) may suddenly become audible. There are several things you can do to control extraneous noise:

  • Use a noise reduction plug-in: if the sound is continuous (“steady-state,” in tech terms) like hum or buzz, you can use a plug-in noise-reduction processor to remove it.
  • Cut the noisy section out: if there are large gaps in the noisy track, get in there and chop them out! Instant silence. The problem is that those sudden silences can sound unnatural, especially in a vocal track where a real person would be taking a breath before singing, etc. So be selective about what you cut, and consider adding a fade-in or fade-out at the edit points instead of leaving a “hard” cut. Solo the track and listen for any clicks, pops, or unnatural-sounding edits.
  • Use volume automation to gently remove the noise without making the track totally silent. This leaves some background ambience in, so the track sounds natural.

Whatever method you use, don’t get too carried away. It’s easy to overclean a track and make it so sterile it sounds like a synthesizer. We’re talking about acoustic guitar here. A pick makes noise when it hits a string. Sleeves rustle when they slide across a guitar body. Strings squeak when your fingers move. Those sounds are part of a real guitar performance and people expect to hear them (whether they know it or not). Take them out and something won’t seem right. But a heavy breath or the thump of a hand accidentally hitting the guitar during the middle of a silent section of a take? Cut it out!

Easy Double-Tracking:

Engineers used to use an echo technique called ADT (automatic double-tracking) to make it sound as if a part had been played or sung twice for a thicker, fuller sound. But with your DAW, you can do the job much better.

  • Record a great track. (That’s always the first step, isn’t it?)
  • Create a new empty track.
  • Copy your track to the new track.
  • Shift the copy track back (later) in time a very small amount to create a bit of delay. I like to set the DAW’s ruler to show milliseconds and slide the track back by just a few milliseconds to begin with. Make sure the track isn’t set to automatically correct rhythms or note placement to a rhythmic value—you want a much shorter delay than even a 16th or 32nd note.
  • Pan the delayed copy track to either side, leaving the original in the center.
  • Turn down the copy track. In most cases the volume will be set correctly when you don’t quite hear it as a separate track but you miss it when it’s muted. You’re after a thickening effect, not the effect of multiple discrete tracks playing simultaneously or an echo effect.
  • Experiment with pitch shifting the copy track up or down by three to eight cents. This will provide a slight, very wide chorusing effect. If you’re using two copy tracks, shift one up five cents and the other down five cents.
  • Try bringing the delayed or shifted copy tracks in only at certain points in a song to help build the dynamics or to add fullness to certain sections.
  • For a more dramatic ADT effect, turn up the copies a bit, and increase the delay to 50–100 milliseconds.

These are just a few of the things you can do with your DAW to enhance your guitar (and other) tracks. Don’t be afraid to experiment. DAWs are nondestructive, meaning that you can always undo a change or an edit and get back to where you started, so you’re free to try whatever you like without losing or ruining your precious tracks. For even more security, save a copy of your project under a new name and work on the copy, keeping your original safe and untouched.

One last tip: The better your original tracks are, the easier it will be to clean them up, make any fixes, and create your final mix. Today’s DAWs are astoundingly powerful, but that doesn’t let us off the hook as guitar players. Start with great tracks, enhance them in the DAW, and you’ll end up with musical, dynamic, and beautiful tracks. By Mitch Gallagher (Acoustic Guitar Magazine)

Setting Up Pro Tools Headphone Mixes:

Create or Open your Session. Under the Options menu make sure that “Low Latency Monitoring” is checked. This will reduce the latency on all Analog Outputs.

Next we want to set the inputs and outputs of every Audio track to analog input and outputs. Do not use the ADAT or SPDIF inputs or outputs. The in/outs are set in the mixer window by clicking on the input and outputs labels and choosing from the menu. Set the input of every track to a separate input. Analog inputs 1-8 usually. Then we need to set the outputs of every Audio track to Analog 1-2 (Stereo).

If you hold down the Option key while changing one output they will all be changed together. Make sure that the Master Fader has it’s output set to Analog 1-2 (Stereo). The Master Fader has no input setting. Next we need to configure the Aux tracks. Set the input to Aux 1 to Bus 1 and the Output to Analog 7 (Mono). Set Aux 2’s input to Bus 2 and the output to Analog 8 (Mono). Now we need to set up every audio track to have send A assigned to bus 1 and send F to bus 2. In the View menu choose Sends A-E and select Send A. Then choose Sends F-J and select Send F.

Now assign Send A to Analog out 7 and Send F to Analog out 8.If you hold down the Option key while setting 1 channel they will all be set. Make sure that Aux tracks 1 and 2 do not have their sends assigned to Bus 1 and Bus 2.

In the Mixer window every channel should show a small fader for Inser A and Insert F. Click the “p” on each insert to make every send pre fader. Use the faders to set headphone levels like you would on a mixer.

Remember that Aux tracks 1 and 2 are the master levels for busses 1 and 2 and make sure that the levels do not peak on those channels.

Multitrack Recording on the iPad

20111208-233757.jpg

You know, these days with technology almost anything is possible. I am going to spend the next couple of paragraphs focusing on the iPad and all the different ways to record your new song ideas, demo tracks or your podcasts. We will test 3 different multi-tracking apps, I will tell you all the tools you will need, and I will tell you a few different ways to get the audio in to your iPad.

There are 3 ways to get audio in to the iPad.

1. Through the internal Microphone
2. Through the headset mic/headphones combo
3. A USB Interface that is compatible with the iPad.

Here is a list of everything you will need to complete this task: (everything that I have)

1. iPad (1st or 2nd Generation).

2. A small (1 or 2 channel) USB recording interface. I use an M-Audio Fast Track Pro.

3. A Powered USB Hub (the iPad doesn’t produce a powered USB port)

4. Apple Camera Connection Kit (converts the apple USB to a normal USB connection.

5. A Microphone or Guitar (with cables) for the interface.

6. A Multitrack Recording App from the App Store (see below)

Here is the configuration from the Interface to the iPad. Please make sure it is all wired prior to testing your system.

USB Interface -> Powered USB Hub -> Camera Connection Kit -> iPad

Now, I am assuming that because you are reading this that you are familiar with multi-tracking prior to this so I will not be going through that definition in any of this article. Please do a Google search for “Multi-Tracking” if you need more assistance with that.

Garage Band:

We are going to start our first session with the always popular “Garage Band”. This is a great song writing tool that with a low price of $4.99 from the app store is our cheapest option in the way of multitrack recording on your new iPad. When you purchase the app you will notice it take a little while to download as it is a huge app, which makes the “under $5” price tag all that more appealing. When you first open Garage Band and start a new song, you will have the choice of what kind of track to add to your song. (Guitar, Smart Piano, etc.)

Choose the “Audio Recorder”. A screen will pop up and you will see a meter that will let you know if you are receiving a signal from your interface. You can record a track and insert it in to your song. Now, there are a few downfalls from garage band… one being that you can only record one track at a time. That is good for the folks out there that are just doing some songwriting such as a guitar track or a piano track, etc. but this app will not be the best one for the serious Podcaster or Demo Song enthusiast.

Studio Mini XL:

I will now move on to the next app in our article, “Studio Mini XL”. This app is available from the App Store for $9.99. That is a little pricey for an app these days, but it does deliver. The difference between this app and Garage Band is that is doesn’t have a waveform to edit. It records to a track, and you see the input but you have no way to edit the actual recorded material other than by volume, effects, etc.

This app also shares the “1 track at a time” limitation.

If you are looking to track a demo (guitar, bass, drums (if premixed through a mixer), vocal) this is the perfect app for you. There are 8 tracks (Upgradeable to 24 for a few bucks more). There aren’t many other apps that offer that kind of multi-tracking power. Except for one.

Multitrack DAW:

This by far is the best app I have found to record my tracks in to the iPad. Not only does it share the $9.99 App Price, but you are able to edit the waveforms directly (Cut, Paste, Copy, Fade In/Fade Out), and it is the only app out there (that I have found) that accepts “Dual Mono” Recording. Which means that with a 2 channel interface such as the Fast Track Pro, you can record two tracks at once. (Guitar and Vocal). Now this is limited to only two tracks (as far as I am aware as I don’t have a 3 or 4 track interface laying around. But, I do remember seeing something on the Multitrack DAW website about “compatible interfaces”.

I did a “Test Interview” with a friend of mine and it recorded perfectly. I was able to edit a slight fade-in and fade-out very easily and the tracks are pure quality.

Plug in your Interface using the method I described above. Open the “Multitrack DAW” recording app and start a new song. Name the song whatever you would like and start 2 New tracks.

On track one, select the “ARM” button and just below that you will see the word “stereo” under ARM button. Hold your finger on the word “Stereo” and slide your finger down until it says “mono 1”. Do the same thing with track two but make it “mono 2”. Now, ARM both tracks to record and press the play button. You will see the waveforms moving across the screen. Record for a few minutes to make sure that you have a good test. Play back each track to see if each one recorded as you wanted it. For example (Guitar DI on track 1 and Bass Guitar DI on track 2). After you have successfully tested your system you are ready to go!

Another great tool within this app is the WiFi option. When hooked to the WiFi network at home or in the office as long as you have your iPad and another PC/MAC on the same network you can swap files, etc.

On the bottom of the app’s opening page you will see the word “Wi-Fi”. Click on it and it will give you an IP Address. (i.e http://192.168.1.2) All you have to do is go to your PC/MAC and enter that IP Address in your browser and you will see your files and songs there. Its the easiest way to swap files from your iPad to your Studio Computer.

Now, I am not saying that this app and the iPad are going to replace your Studio DAW, that is not the intention. This is meant to be a quick, easy way to track on the go. I use it for various Interviews and on-location recordings when my studio DAW is unavailable.

The files it saves are in .wav format, which is a large file (depending on the length of your recordings) but will import directly in to your studio DAW such as Pro Tools, Cubase, etc. for final mixing, and editing.

I hope that this article has helped open your mind to new and creative ways of recording music, demos, or pod-casts.

Please leave a Review!

Getting a Great Vocal Recording…

When looking to get a  high quality vocal recording, many things can be confusing so having clear understanding of the process will definitely help with the process.

Choosing The Right Microphone:

First of all you need to decide if you’re going to use a Small or Large diaphragm microphone. Your choice of microphone for a singers particular vocal tone can have a dramatic effect on the final mix. Typically, in today’s industry, large diaphragm microphones are the standard. They offer a certain warmth and smoothness but can also lend your singer an airy/sizzly tone. Cardioid-Pattern Capacitor Microphones are the most common for any type of Pop or Urban recordings. However some singers prefer to use dynamic microphones such as some ‘Shure’ models because it brings out a certain tone in their voice.

Although the make and model is important, the tonal characteristics and overall sound is key! This is much more important to the singer than a lot of producers and engineers can appreciate. Most singers don’t care what microphone patterns, make and model is used, just as long as you can bring out a good sound in their vocals. There is nothing more frustrating to a singer than knowing they nailed a perfect take, only to find out the recording doesn’t do it justice.

Polar Patterns:

This also ties in with ‘Choosing The Correct Microphone’ section above. It’s important to take the polar patterns of certain microphones in to account when purchasing your next microphone. Cardioid-Pattern Microphones are the industry favorite because they generally exclude most off axis sounds, such as room reflections, spill from other sources and the home studio nightmare of the computer fan / cooler! We would recommend not using an omnidirectional pattern microphone unless you have a vocal booth. Omnidirectional microphones are equally sensitive all round and will pick up a lot of unwanted sound. If you do have a vocal booth you may find that this type of polar pattern can pick up a more desired vocal sound, or natural ambiance. Try testing out different microphones with different polar patterns and compare the recordings and see what you prefer. As long as you have a good ear for music, it’s all about personal taste.

Ribbon microphones are also worth mentioning. As of late, these microphones are showing up in more and more studios. They all have figure-of-eight polar patterns and deliver a very unique and bright sound. Figure of eight polar pattern microphones are equally sensitive to the front as they are the back. In a home studio, putting a sound absorbing panel behind the microphone can stop any unwanted sound to leak in to the vocal recording.

Acoustic Problems And Treatments:

Unless your studio has been professionally designed by professional acoustic designers there will be reflections from lots of different sources in your recording room.

Why is this such a big problem?

Well, if you get the sound you’re after you will still have the reverb and reflections from the room layered over the vocal take. So when adding a nice reverb sound in the mix, you’ll essentially be adding reverb to an already reverberated signal. This is a huge problem in the typical home studio.

Home studios have lots of unwanted room reflections and prevent you from achieving a professional sound. Overlooking acoustic treatment is a big mistake. You could spend thousands on a great selection of microphones and equipment, but without a correctly treated recording booth / room you’ll have problems at the mixing stage.

Shock-Mount & Pop Shield:

While a Shock-Mount is not the most important aspect in achieving a great vocal sound, it will stop those annoying low end vibrations coming up from the floor. Most decent microphones will come with a Shock-Mount.

Before you can start recording, purchasing a decent Shock-Mount and Pop Shield is vital. Fitting the pop shield a few inches away from the microphone will stop the popping and booming problems you’ll get in the vocal performance. Certain words and sounds, such as ‘P’ will give that effect, using a pop shield eliminates the blasts of air (called ‘Plosives’) hitting the microphones diaphragm.

Recording Vocals:

Now you’re finally ready to start recording the vocals. We would suggest not using much compression (if any) at the recording stages, and definitely no EQ. Recording the sound with no processing allows more flexibility and control at the mix stage. Experienced engineers may use certain types of processing at the recordings stage, but this is risky. What might sound great when isolated might sound terrible in the mix and frequency spectrum. For this reason I would suggest recording with no effects or processing. A tiny bit of compression can work well, but make sure not to overdo it. You can always add more at the mixing stage!

When recording vocals it’s important to help the singer achieve the best performance. For starters, setting up a good headphone mix can make things much easier for yourself and the singer. The headphone mix must be well balanced, giving the singer a small amount of reverb or delay. It’s also a good idea to do a few test recordings and find out what headphone mix the singer likes. They may want to be smothered in reverb if that helps make them confident. As we mentioned earlier you don’t want any processing on the vocals during recording, so even though you’re giving the singer reverb, make sure it’s not on the recording. Simply add the effects and processing on the output of your channel as you send it to the microphone amp for the singer. You’ll want the flexibility to add different reverbs and see what sounds good later on. You always want as much freedom as possible at the mixing stage.

Be Friendly

Your attitude as a producer / engineer can also be the deciding factor in the singer delivering a good vocal performance. Try to be encouraging rather than critical about their performance. It’s usually a good idea to get the singer to sit in with you after recording a few vocal takes and let them listen to what they’ve recorded. They are usually their own best critics, so if they can assess problems themselves then it makes your job a lot easier. Usually they’ll ask if they can do another take or correct a line in the song. If a singer is constantly not delivering a good performance then don’t keep them in the booth until they get it right. Give them a short 10 – 15 minute break. This can work wonders. Remember, the best tool in having your singer give the best performance is confidence. Make them comfortable and let them adjust without telling them constantly what they’re doing wrong.

Spoiling them with green tea and honey can also help to make them more comfortable. A singer needs lots of fluids to keep their mouth and throat moist so avoid alcohol which will just dehydrate them. Water is the best drink.

Mixing & Processing Vocals:

Once everything is recorded and you’ve compiled your favorite takes to create the master and cleaned up any unwanted noise and breath effects in the gaps, you can use a variety of processing and mixing effects to touch up the vocals to get the final polished sound.

EQ:

When it comes to EQ there’s nothing set in stone. Although following the list below will help you start to clean up the sound:

  • Removing some of the 150-450Hz range will remove some low-mid range boxiness.
  • Boosting Frequencies around 8 kHz + can add a nice airy tone, and crisp effect to the sound. However, watch out for the ‘S’s and ‘T’s as any brightening will inevitably boost these.
  • When using EQ make sure to boost and cut as little as you can get away with. Drastically changing the sound with EQ will give an un-natural sound to the performance.

Compression:

This is my favourite part of processing vocals. A compressor works in 2 ways. Firstly the main purpose of a compressor is to even out the peaks and dips in the recording. By squeezing the volume of the recording a compressor will make the loudest parts of a recording sound closer in volume to the quietist parts. This gives a smooth, even volume and is kind on your ears.

The second and more important aspect of compression is the musical energy that it gives to a recording. When used correctly compression adds an immediate pressure and energy to very dynamic recordings that can really bring a vocal take to life. Listen to a radio DJ and you’ll be able to hear the compression pumping away to keep the volume of the voice on an even level. Radio compression is excessive so as to protect peoples hi-fi speakers so I’m not suggesting you use such drastic settings but experiment and you’ll soon discover that compression is the most important tool in processing of vocal recordings.

Aiming for about 6-9dB of gain reduction, using a ratio of between 2:1 and 7:1 on the loudest parts in the track should give you a good starting point. Make sure when setting the attack and release time you get an even sounding reduction. It’s important not to get that ‘breathing’ effect. You don’t want to hear the compressor working, you just want the vocals to sound even.

Summary:

Make sure you plan the recording process, take your time with the singer and mixing stage and have fun. Experiment with different techniques and find what works best for you and the singer you’re working with. By reading this you’ve taken your first step to achieving the industry professional vocal sound you’ve been looking for. Good luck!

Recording Drums the “Deacon Tim” way.

Recording drums is a science all in itself and no one way will be the perfect way for everyone, so as you learn over time remember that the only way to get the sound that you are looking for is to experiment.

This particular post will be based on a recording setup with 6 to 8 inputs to keep it fairly common for all studio types.

Let’s begin.

The most important thing to have when you are recording drums isn’t your collection of fancy microphones, compressors or EQ’s… It’s making sure that you have a good sounding drum set to begin with. Even the most seasoned professional sound engineer with the best studio space and top-of-the-line equipment, couldn’t make an out of tune drum set sound good.

So for the sake of your future recordings, get the set sounding good before you start recording, you won’t be disappointed. I will now talk about the specifics of each mic placement.

Bass Drum:

The bass drum has long been one of the hardest drums to get the right sound out of. The method I use depends on the sound that the client is looking for. Some people like the “thump” and some  like the “hit”. Since my recordings are all done on a budget, I will keep this limited to the “1 mic” method. I use an AKG d112 Bass Drum Mic. This mic is pretty much the industry standard when it comes to recording the bass drum. You are welcome to use any kind of mic you want, just remember that the bass drum has a really low-frequency and a mic that is used for high frequencies such as condensers, etc. may not give you the “thump” or the “hit” that you want.

It seems like in my experience, I get the best “thump” sound from the bass drum if I place the mic through the sound hole and make sure the front of the mic is about half way between the two drum heads. I usually place a towel in the drum as well which helps to dampen the sound from bouncing around as well as giving you a nice surface to place your microphone.

The other method I have used regularly is the outside the drum method. This will require a mic stand. Try experimenting with all different mic placements on the front of the bass drum head. The one that works best on my studio kit is about 4 o’ clock if you were to picture the drum head as a clock face. In that position I get a about an even amount of “thump” and “hit”, which is usually what the client is looking for.

Snare Drum:

Click For Larger Image

I have always heard tales of sound engineers having so much trouble getting the right snare sound, I for some reason always seem to get what I am looking for. (mostly luck I think) I use a Shure PG-5 Drum mic for the snare, but there are many other options out there.

Most good drummers will have what I like to call a “sweet spot” on the snare. This is the spot that they seem to hit most often. This will be the focal point for you microphone. You will want to start out by positioning your mic in-between the snare and high hat and at least an inch off the snare. Point the microphone towards the sweet spot and angle it down at about a 45 degree angle. You can change the angle and distance to achieve the sound you are looking for, so this is just how I do it.

I have also got a great sound out of a snare by placing the mic level to the snare and off to the left side facing the rim, but I don’t recommend starting with this method. Another thing that larger studios will do is to place a mic underneath the snare as well, what this does is give the sound engineer some options as far as mixing the snare. The top mic gets the “pop” of the stick and the bottom mic gets the “rattle” of the snares, and if mixed properly will sound absolutely amazing.

Toms:

Click For Larger ImageClick For Larger Image

For the toms, getting the best sound will be time-consuming, they will sound great when you hit them, but getting that “thud” to come through the recording will take some time. Let’s go over the basics.

As with the bass drum , the rack tom and floor tom have a lower frequency and will require mics that can handle and project that frequency to your recordings. They will sound great when you hit them, but getting that “thud” to come through the recording will take some time.

The mic placement on the toms that I use is very similar to the Snare mic technique I talked about above. Start out by placing the mic about 1 inch off the head and at the same 45 degree angle toward the “sweet spot” on the drum head. This will be the best starting point. From here, just play with moving the mic farther away, and the angle of attack to achieve the desired sound.

Hi-Hats:

Click For Larger Image

I have long been a fan of having an extra track just for the hi-hat. You can get a great hi-hat sound from just a single overhead mic (which I will cover in a few minutes) but having the extra mic just on the hi-hat will make the overall perfect drum mix that much easier to achieve.

I use a low-grade studio condenser mic to record the hi-hat. I place the mic facing towards the outer edge of the hi-hats, as I have found in my many years that is gets a nice representation of the “sizzle” that I want when mixing the drum track. The mic is usually placed about 1 or 2 inches off the edge of the cymbals and is pointed away from the snare/tom to avoid as much bleed-through as I can.

You are always going to get some bleeding between mics so the best thing to do is try hard to minimize that by always being considerate of the other mics when doing your mic placement.

Overheads:

Click For Larger Image

The last thing I will talk about will be the Overhead Mic. This will be the one that requires the most time invested but when you find the right placement, it will all be worth it.

There are a hundred different ways to place the overhead mics, I will be talking about the “1 mic” method.

I have generally found that I get the best “overhead” drum sound when I place the mic about 4 feet over the drum set with the mic placed towards the front of the set just above the front edge of the bass drum. it seems to get a nice mix of the cymbals (ride, crashes and hi-hat) while still giving me a little bit of the drum set as well. You will NEVER be able to record cymbals without having the drums bleed through. It’s a fact of life and you will need that “room” sound later when you go to mix your drum track, so don’t worry if all you hear is the whole drum set and cymbals in your overhead mic.

Another popular method is to place the overhead mic about 4 feet above the set behind the drummers right shoulder facing the snare drum. The best way to insure proper placement is to get a bit of string and measure the distance from the mic to snare drum and the mic to the bass drum beater. This should be the same distance. It is not the best sounding method but if you have limited inputs and need a good “overhead” drum image, it is a pretty good method to try.

Well I hope in reading this that I have at least given you some starting points, as I said before, the only way to get the sounds that you are looking for is to experiment, experiment, experiment. Then when you are finished with that… experiment some more.

Good luck and remember you can always contact me with any questions or concerns about your unique situation at:

timplunkettmusic@gmail.com

Thanks for reading.

Mac vs. PC for Audio Recording and General Music Production.

In the debate over Mac or PC, in my opinion there is one true winner… but everyone’s opinion is different due to the nature of the project you are working on, and your budget.

Your decision should also be based on your experience level. Are you new to recording music? Are you a seasoned professional? I will take you through every level in hopes that in the end of this article, you will at least have a better idea of what your needs are.

Cost: True or False: You have to have a million dollars worth of equipment to sound like a million dollar recording? False. The most important part of your recording gear doesn’t cost you a dime and you were born with them attached to your head. It’s your Ears. You will then need to build your gear around your ears and your budget carefully. There are a lot of great mixers, interfaces, etc. out there that don’t cost a whole lot and will last you for years if you just know what you are looking for and where to find it.

PC’s are definitely a lot better on your budget and are more readily available. You can get on any online selling website these days and pick up a great PC for around $200 – $300 that would make a great home studio rig. The Mac however is a little harder to find, and costs usually around twice as much. The thing to remember is that just because the Mac costs more, doesn’t mean that it is the best choice. I have recorded with both PC’s and Mac’s for years now and they both have their advantages though they differ in price.

Compatibility: When choosing the Mac or PC make sure that any existing equipment that you already have (mixers, interfaces, software, etc.) will be compatible with your new system. This is one category where I agree that the PC is far superior. Most modern software (Pro Tools, Cubase, etc.) is available and compatible with most PC and Mac systems, but the difference lies in the details.

The PC’s for example will usually run many versions of the recording software on the same version of Windows. So you will have many more options on which versions of software you will get to use and they will not need to be upgraded for years if all goes right. The Mac however is a little different. As with everything Mac, software, hardware etc. is always reliant upon what version of OSX (10.5.5, 10.6.1, etc.) that you are using. Then you have to make sure that each individual piece of equipment and recording software is also compatible with your exact version of OSX. Now, I know from personal experience that even thought Mac will tell you that the version of Pro Tools 8 won’t work on OSX 10.6.1, i have seen it first hand and it seemed to work fine. Mac is just very careful about guaranteeing anything that might come back and bite them. Can’t blame them. One plus of the Mac is they will usually come with recording software called “Garage Band” installed. Now, this isn’t as fancy as Cusbase or Pro Tools but you can always upgrade it later.

So when choosing the Mac or PC for your home studio, make sure to be aware of what versions of recording software work with what versions of operating software. In the end, it will save a lot of headaches, trust me.

Performance: In the overall grand scheme of things, most people will tell you that Macs are faster… I disagree. Have you ever noticed that all big time gamers use PC’s? The real contest here is which one is more productive. The PC is a great platform with almost unlimited options on memory, motherboards, etc. but PC’s are more prone to conflicts from viruses and hardware failures. The Mac, though it has many less options, will work straight out of the box and will give you years of service with fewer conflicts. This is important when deciding which platform to choose to be the workhorse of your home studio.

Closing Arguments: I have used both Mac’s and PC’s in my 20+ years of experience recording music and for me, the Mac has always been a much less aggravating experience for making music.  I am much more productive with the Mac and there seems to be fewer snags when I decide to make a song, and I worry less about security, crashing, and compatibility when I want to add on to my system.  That doesn’t mean that I am against using PC’s, I just think for my projects the Mac was the best choice.

Please don’t let this detour you from trying out your own ideas and seeing what works best for you and your budget.

In the end, the most important thing is that you are comfortable and confident with your gear so you can spend less time fiddling with it and more time recording with it.

Deacon Tim over and out.

Please leave your comments below!